The Importance Of Surrounding Components In Electronic Circuit
Troubleshooting and repairing electronic equipment can really make us have a great satisfaction whenever a problem is solved. You don’t mind how many hours have been spent especially if you are a beginner and your only focus is to find out the fault and make the equipment work again. What you want is experience and the fun of learning new things as you progress to search deeper about electronic repair. But some of us as electronic troubleshooter gave up easily if come across problems that are difficult to solve, perhaps you do not understand how the circuit work and i myself was in this situation before. Don’t worry if you don’t understand how a particular circuit work as you read on I will provide some solution for you.
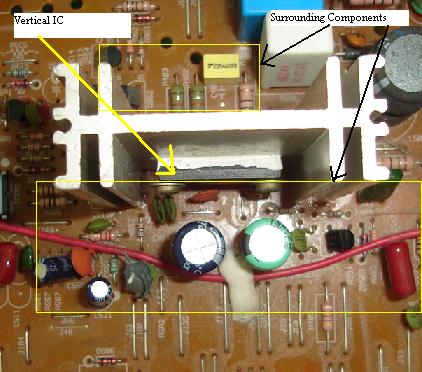
Usually a repair technician or engineer has a procedure or their own style of repairing equipment. I can say most of us as electronic repairer perform a test first to see what the fault is before begun to open up the equipment and repair. For example, a Monitor with one bright white horizontal line across the screen reveals to us that the fault is in the vertical section or circuit. Once the cover opens, we will head straight to the vertical section and look for dry joints, perform voltage testing, check for related components, test vertical yoke coil and even direct replace the vertical IC.
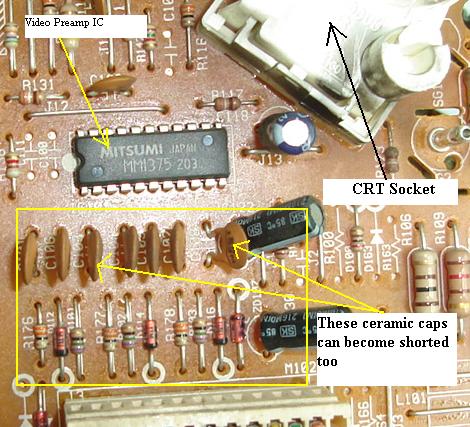
This is a normal procedure for those who have vast experience in electronic repair and truly understand how a particular circuit works. What if you are new in this repair field or don’t really understand how the circuit work? Then how are you going to solve the problem? Easy! Just direct replace the suspected section IC and check all the surrounding components. Let me put it into a better picture. A color problem usually related to the color board of a Monitor. If you don’t understand how a color circuit work-never mind, what you do is just direct replace the color IC (usually the board will have two IC’s-one is the video pre-amplifier and the other is video driver IC) and retest the Monitor. If the Monitor works fine then your problem solved. However, if the problem still remains, then you have to use another method which is checking all the surrounding components.
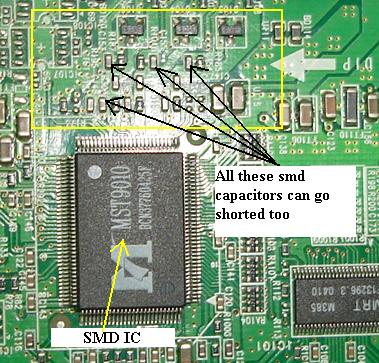
You would not believe that many times the IC is not at fault and the real culprit was the surrounding components like a shorted ceramic capacitor, diode or even transistor. Two weeks ago, I came across a LCD Monitor with display shut off after few seconds. After some checking I confirmed that it was the inverter board faulty. It’s a small board with many SMD components on it except the high voltage transformers and couples of electrolytic capacitors. The inverter IC is a SMD as well and I do not have this part. I proceed to check the surrounding components first before decide to order the inverter IC online. Do you know what I found? I found a shorted SMD capacitor somewhere nearby the inverter IC. The value was 0.15 microfarad and a new capacitor brought the LCD Monitor back to life again.
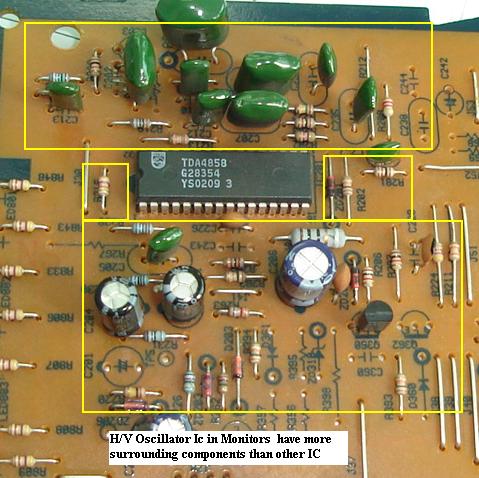
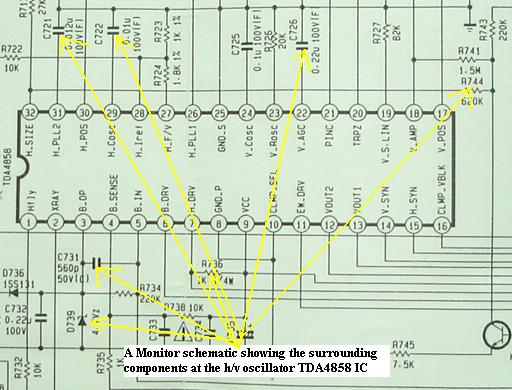
Another case, it was a China made 15” Monitor, the high voltage rise up to 15 KV and shutdown after tested it with a high voltage probe. I suspect the horizontal circuit is causing the problem but a new h/v oscillator (TDA4857PS IC) won’t help either. Next I just solder out all of the surrounding components (components only related to horizontal pin out) and check one by one and found one of the resistor has gone up in resistance. I do have the choice to start tracing from the pins of the IC but I found removing all surrounding components and test which is faster.
This method also can be use if you can’t find any data for a particular IC, for example a new equipment model in the market. As mentioned above it is not necessary always IC’s fault. However, if you have confirmed that all of the surrounding components tested okay then chances are high that the IC indeed faulty. This is true only if you are really sure that the circuit is the cause of the problem. In other words, you would not replace horizontal/vertical oscillator IC when there is a color problem would you?
Although you can repair electronic equipment by checking all of the surrounding components, in fact I do encourage you to learn beyond than that such as voltage and signal tracing as these methods can really speed up your repair work. You must also learn how to read a schematic diagram as well. I want you to know that some problems can’t be solved by only checking surrounding components. For instance, if the h/v oscillator IC didn’t send a signal to the gate pin of B+ FET, the display will become small (small width). Now if you check all the surrounding components in the B+ circuit, I’m sure you would not find any bad component there because the problem is in the h/v oscillator IC and this IC is located a bit far from the B+ circuit. Your time will be wasted and the problem can’t be solved!
Conclusion- This article act as a guide to assist you so that you can use the checking surrounding components method on whatever type of equipment you want to repair include boards that use lots of SMD IC’s. Your basic electronics and testing skill have to be strong otherwise a bad component you might think it is good and at the end you will not be able to detect the fault. Continue to learn and improve yourself and I believe one day you shall achieve what you want to be. All the best to you!
|
|
Copyright@ 2006-2014-www.ElectronicRepairGuide.com All Rights Reserved
